date: 2020-12-03 updated: 2020-12-03
基于 Vue Genesis 微前端的前端插件化 Genesis
是一个轻量级的 Vue SSR 库
安装 为了减少生产依赖的大小,Genesis
特意拆分成两个包,@fmfe/genesis-core
负责核心的 SSR 渲染逻辑,@fmfe/genesis-compiler
负责在开发阶段和编译阶段使用,在生产环境中不需要它
1 2 npm install @fmfe/genesis-core npm install @fmfe/genesis-compiler -D
TS 运行时 文档内所有的例子都基于 ts
进行编写,关于如何在 Node
运行 ts
,请了解 ts-node 。如果你不想使用 ts
,可以跳过这个步骤,只需要将文档的例子,修改成 js
语法即可
1 npm install ts-node typescript -g
HTTP 服务 因为 Genesis
只是一个 SSR 库,它不具备创建 HTTP 服务的能力,所以这里我们还需要安装 Express
。如果你选择了其它的框架,可以跳过这一步,并且将例子中的代码,转换成对应框架的代码即可
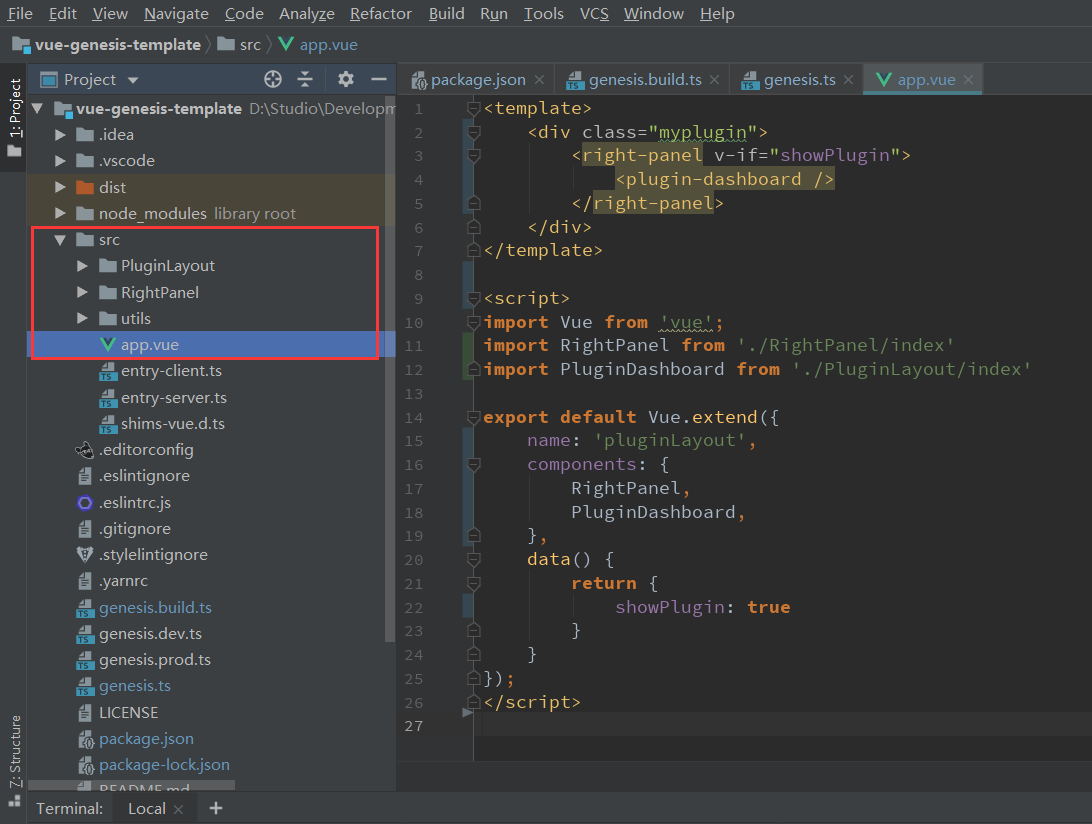
vue-genesis-template 编写插件 在 src
中编写插件代码
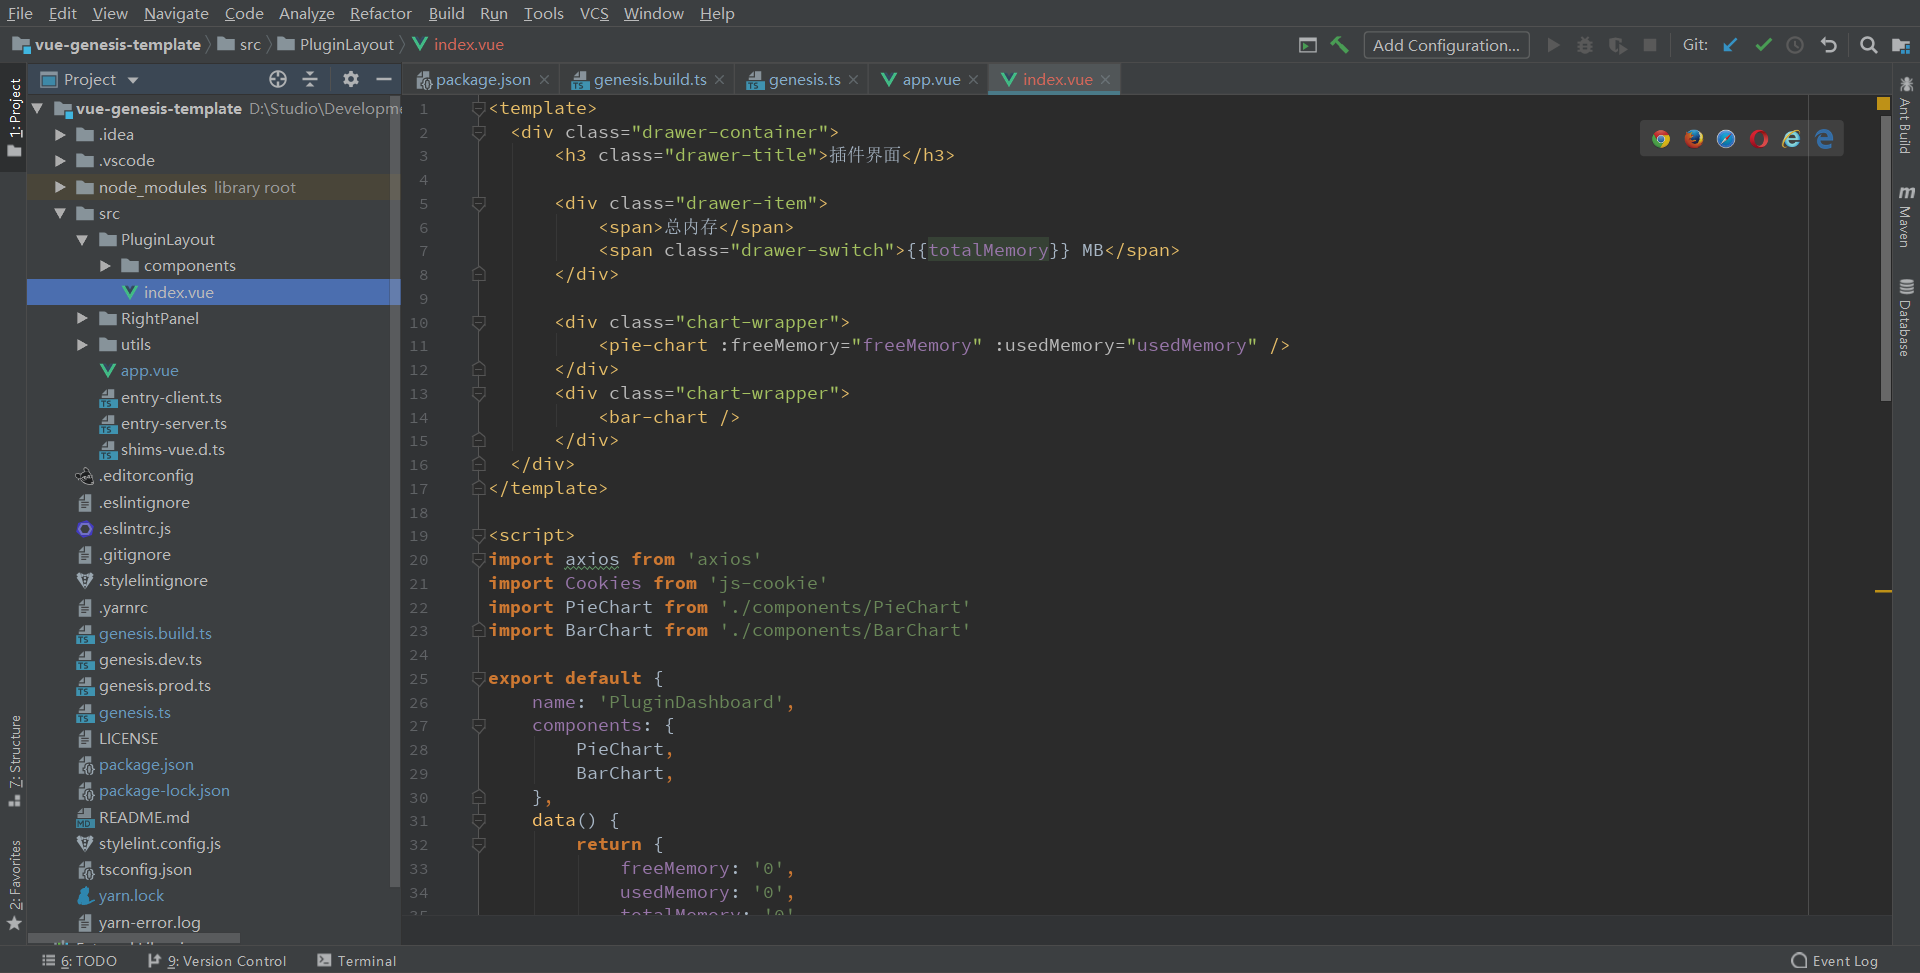
插件仪表盘界面
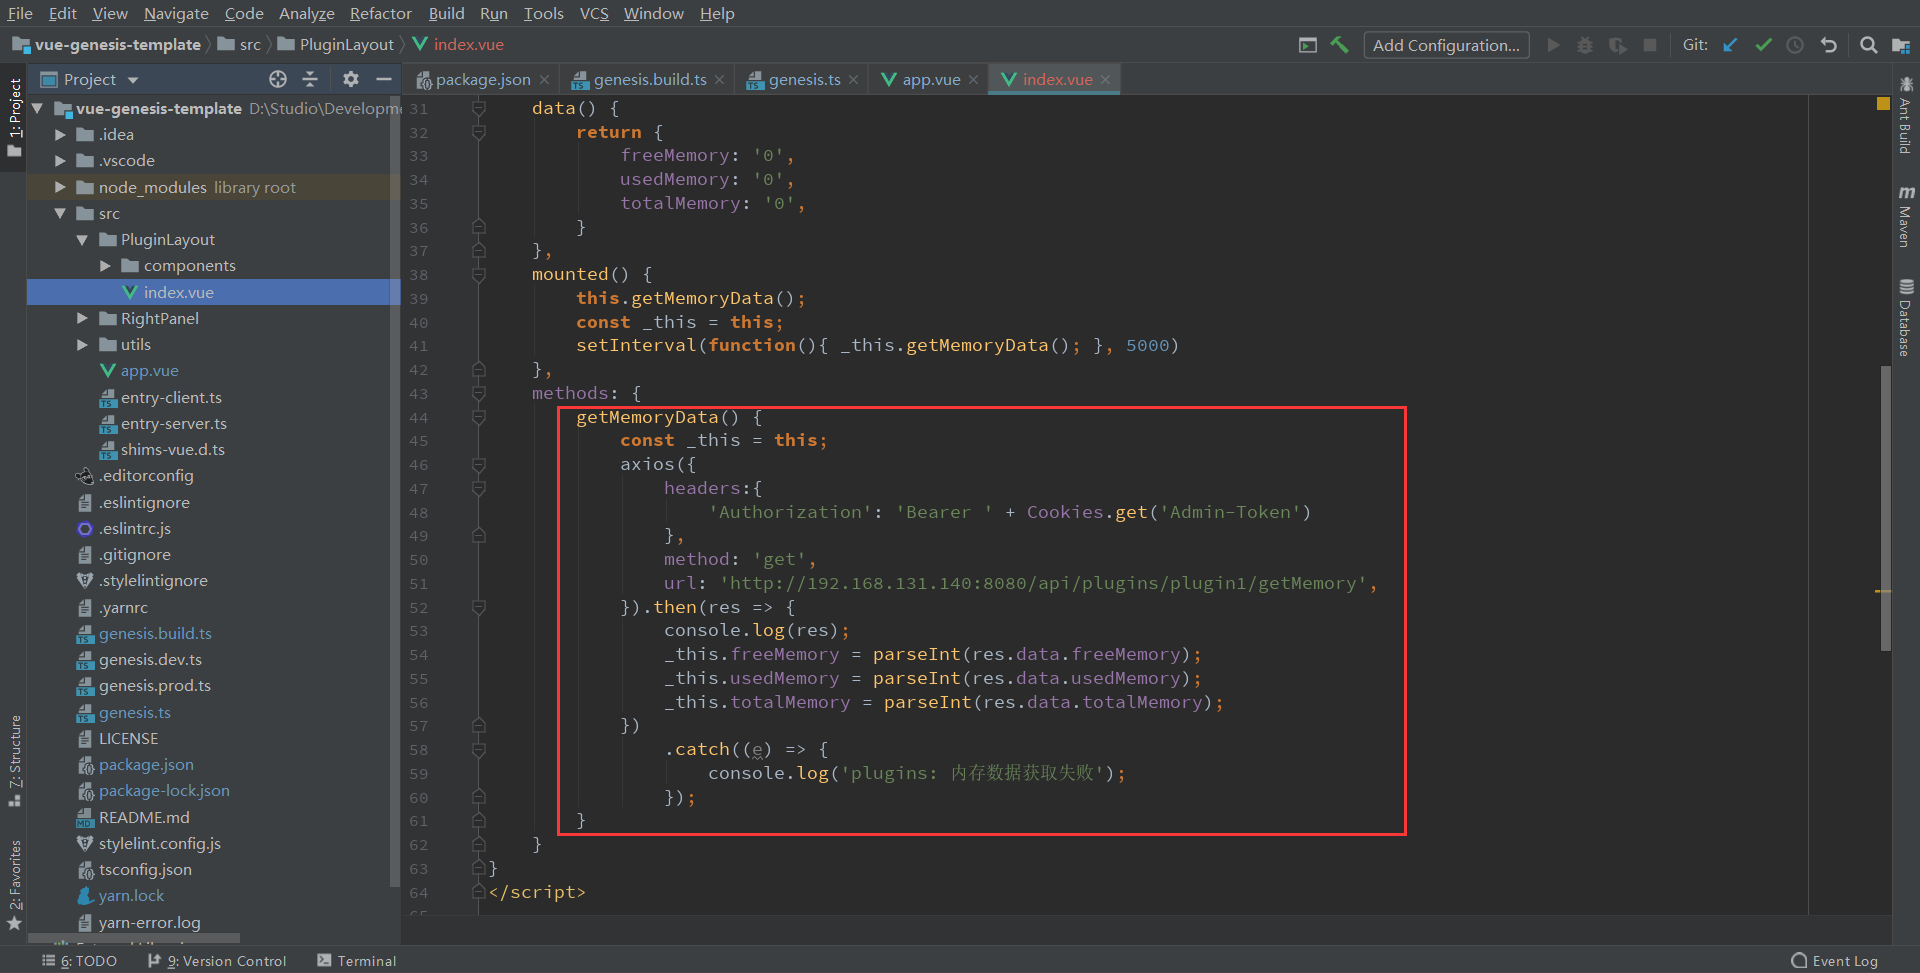
与后台接口交互
1 2 3 4 5 6 7 8 9 10 11 12 13 14 15 16 17 18 19 20 21 22 23 24 25 26 27 28 29 30 31 32 33 34 35 36 37 38 39 40 41 42 43 44 45 46 47 48 49 50 51 52 53 54 55 56 57 58 59 60 61 62 63 64 <template> <div class="drawer-container"> <h3 class="drawer-title">插件界面</h3> <div class="drawer-item"> <span>总内存</span> <span class="drawer-switch">{{totalMemory}} MB</span> </div> <div class="chart-wrapper"> <pie-chart :freeMemory="freeMemory" :usedMemory="usedMemory" /> </div> <div class="chart-wrapper"> <bar-chart /> </div> </div> </template> <script> import axios from 'axios' import Cookies from 'js-cookie' import PieChart from './components/PieChart' import BarChart from './components/BarChart' export default { name: 'PluginDashboard', components: { PieChart, BarChart, }, data() { return { freeMemory: '0', usedMemory: '0', totalMemory: '0', } }, mounted() { this.getMemoryData(); const _this = this; setInterval(function(){ _this.getMemoryData(); }, 5000) }, methods: { getMemoryData() { const _this = this; axios({ headers:{ 'Authorization': 'Bearer ' + Cookies.get('Admin-Token') }, method: 'get', url: 'http://192.168.131.140:8080/api/plugins/plugin1/getMemory', }).then(res => { console.log(res); _this.freeMemory = parseInt(res.data.freeMemory); _this.usedMemory = parseInt(res.data.usedMemory); _this.totalMemory = parseInt(res.data.totalMemory); }) .catch((e) => { console.log('plugins: 内存数据获取失败'); }); } } } </script>
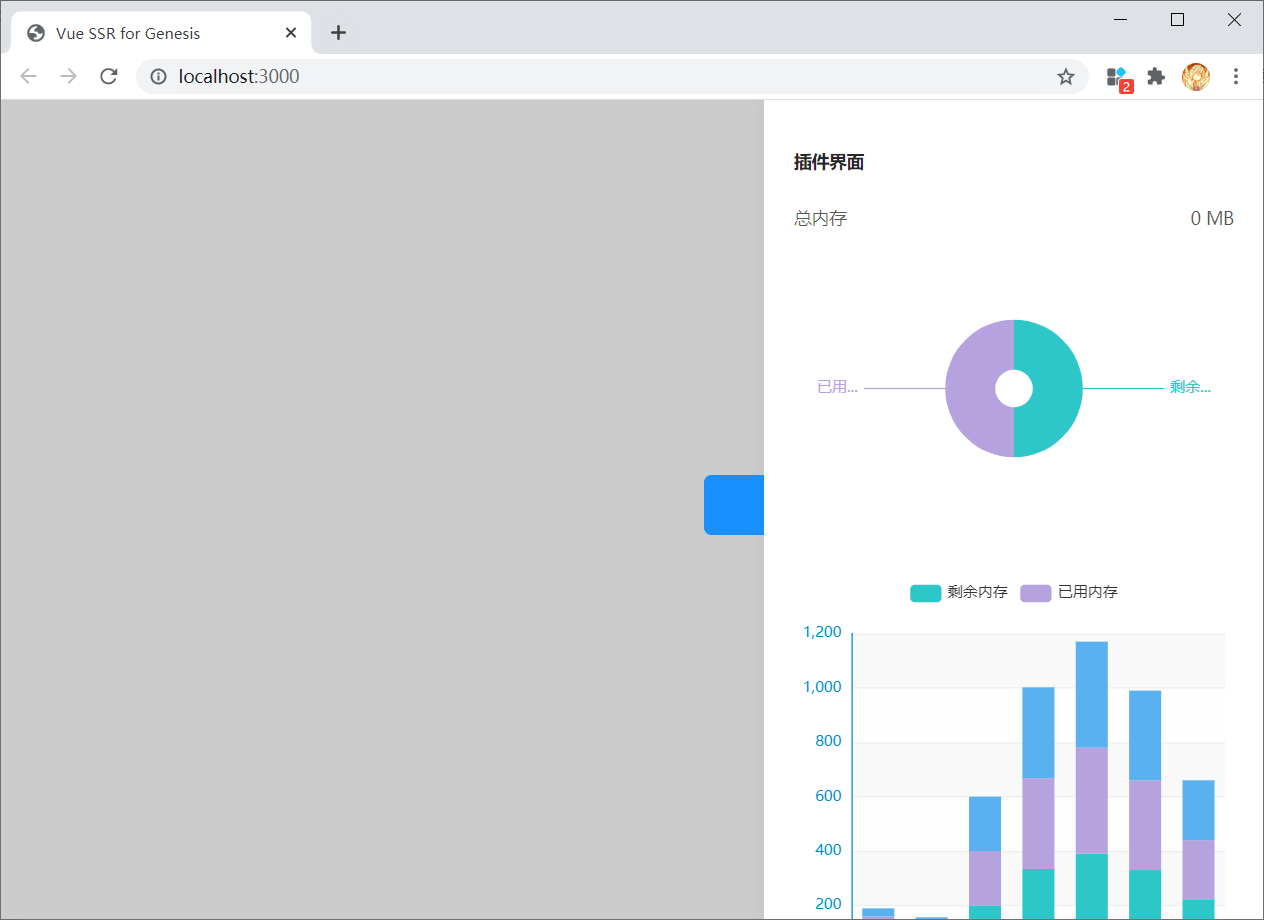
执行 npm run dev
,打开浏览器访问 localhost:3000 查看效果
编译 修改 genesis.build.ts
文件编译代码
1 2 3 4 5 6 7 8 9 10 11 12 13 14 15 16 17 18 19 20 21 22 23 24 25 26 27 28 29 30 31 32 import path from 'path' ;import fs from 'fs' ;import { Build } from '@fmfe/genesis-compiler' ;import { ssr } from './genesis' ;const start = async () => { const build = new Build(ssr); await build.start(); const renderer = ssr.createRenderer(); const result = await renderer.render({ mode : 'csr-json' }); fs.writeFileSync( path.resolve(ssr.outputDirInClient, 'app.json' ), JSON .stringify(result.data, null , 4 ), 'utf8' ); }; start();
重复文件名会报重名错误,修改 genesis.ts
中创建 SSR 实例的属性
1 2 3 4 5 6 export const ssr = new SSR({ name: 'my-plugin' });
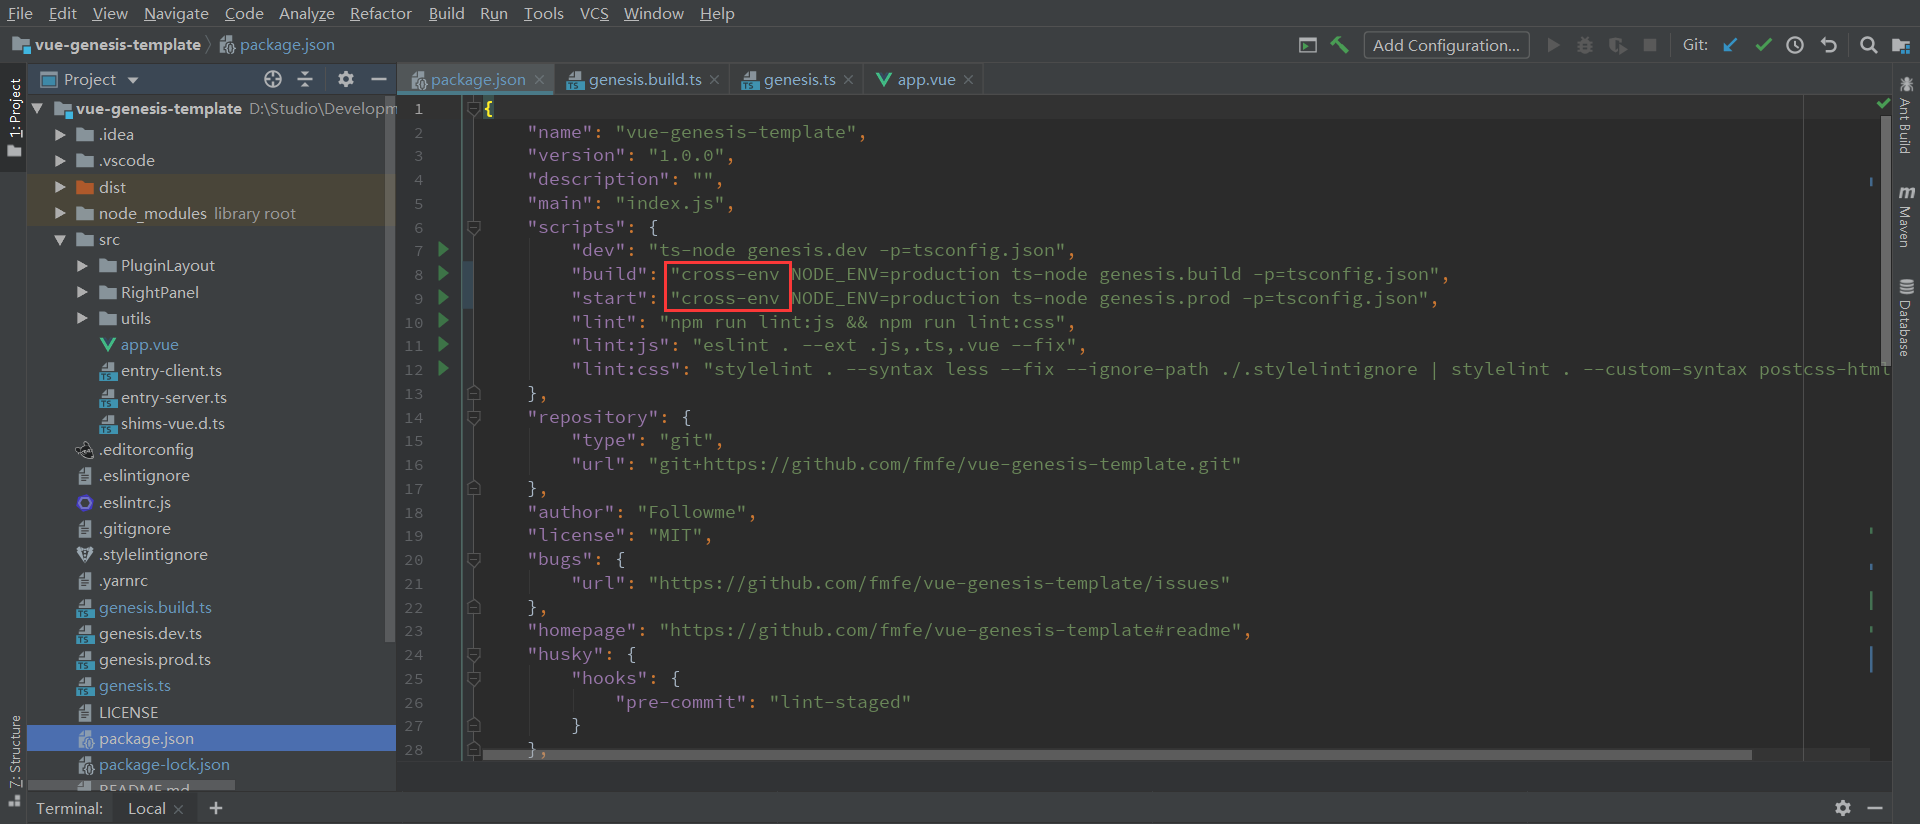
原 package.json
的 build
代码中含有 rm -rf
,需要 Linux 环境。此处为 Windows 环境,修改并增加 cross-env
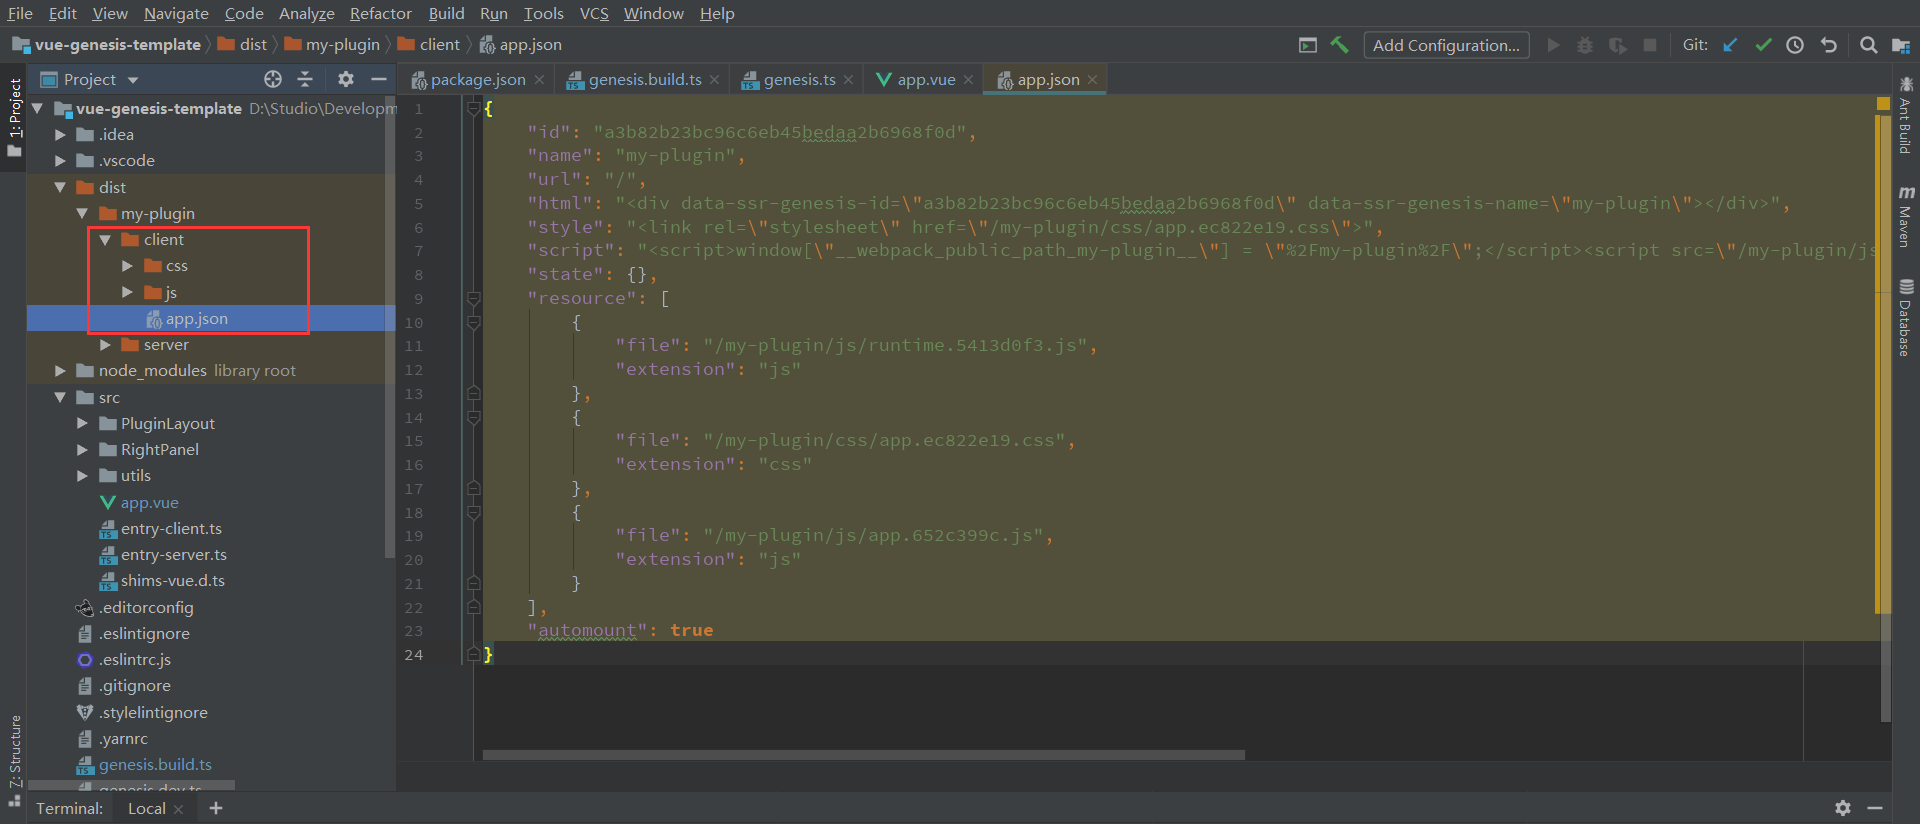
执行 npm run build
,dist
文件夹下生成编译后的插件的静态文件
只需要将 client
目录的静态文件部署到服务器即可
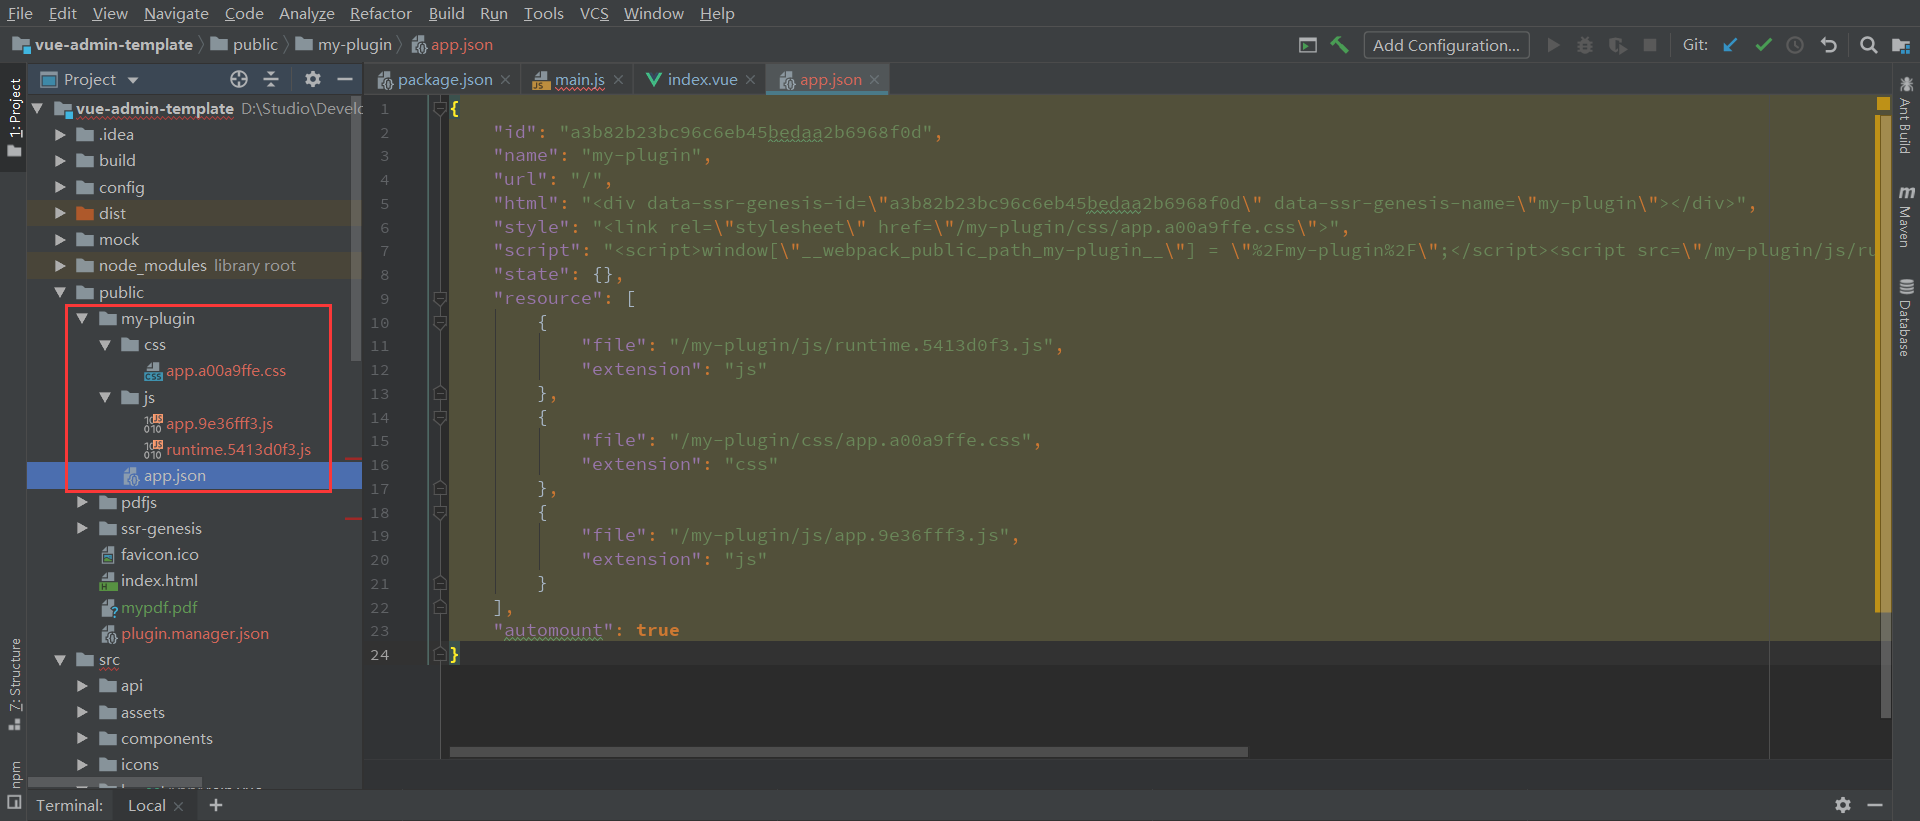
主项目远程组件加载 假设静态资源的基本路径是 /my-plugin/
,那么就可以通过 /my-plugin/app.json
访问到这个文件
在主项目上安装远程组件
1 npm install @fmfe/genesis-remote axios
在对应的路由上,使用远程组件,加载此组件即可
1 2 3 4 5 6 7 8 9 10 11 12 13 14 15 16 17 18 19 20 21 22 23 24 25 <template> <div class="app"> <RemoteView :fetch="fetch" /> </div> </template> <script lang="ts"> import Vue from 'vue'; import axios from 'axios'; import { RemoteView } from '@fmfe/genesis-remote'; export default Vue.extend({ components: { RemoteView }, methods: { async fetch() { const res = await axios.get('/ssr-genesis/app.json'); if (res.status === 200) { return res.data; } return null; } } }); </script>
若有多个插件或需求控制插件的开启关闭,则需增加插件管理机制
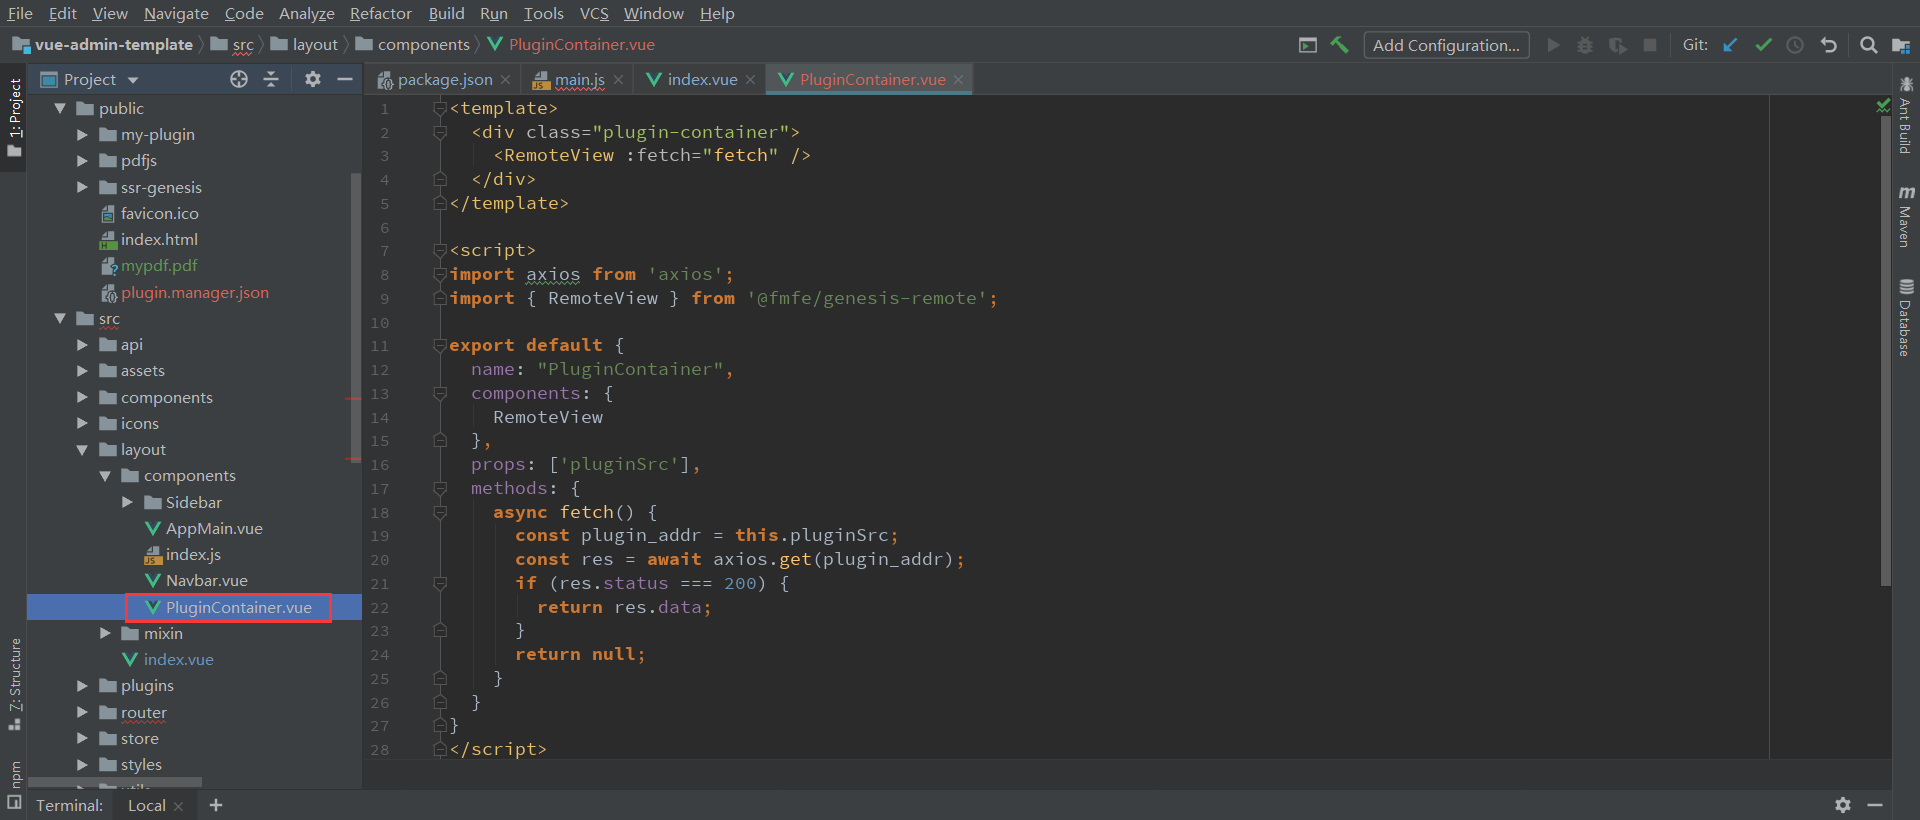
增加插件管理 给远程组件增加插件的路径属性
1 2 3 4 5 6 7 8 9 10 11 12 13 14 15 16 17 18 19 20 21 22 23 24 25 26 27 28 <template> <div class="plugin-container"> <RemoteView :fetch="fetch" /> </div> </template> <script> import axios from 'axios'; import { RemoteView } from '@fmfe/genesis-remote'; export default { name: "PluginContainer", components: { RemoteView }, props: ['pluginSrc'], methods: { async fetch() { const plugin_addr = this.pluginSrc; const res = await axios.get(plugin_addr); if (res.status === 200) { return res.data; } return null; } } } </script>
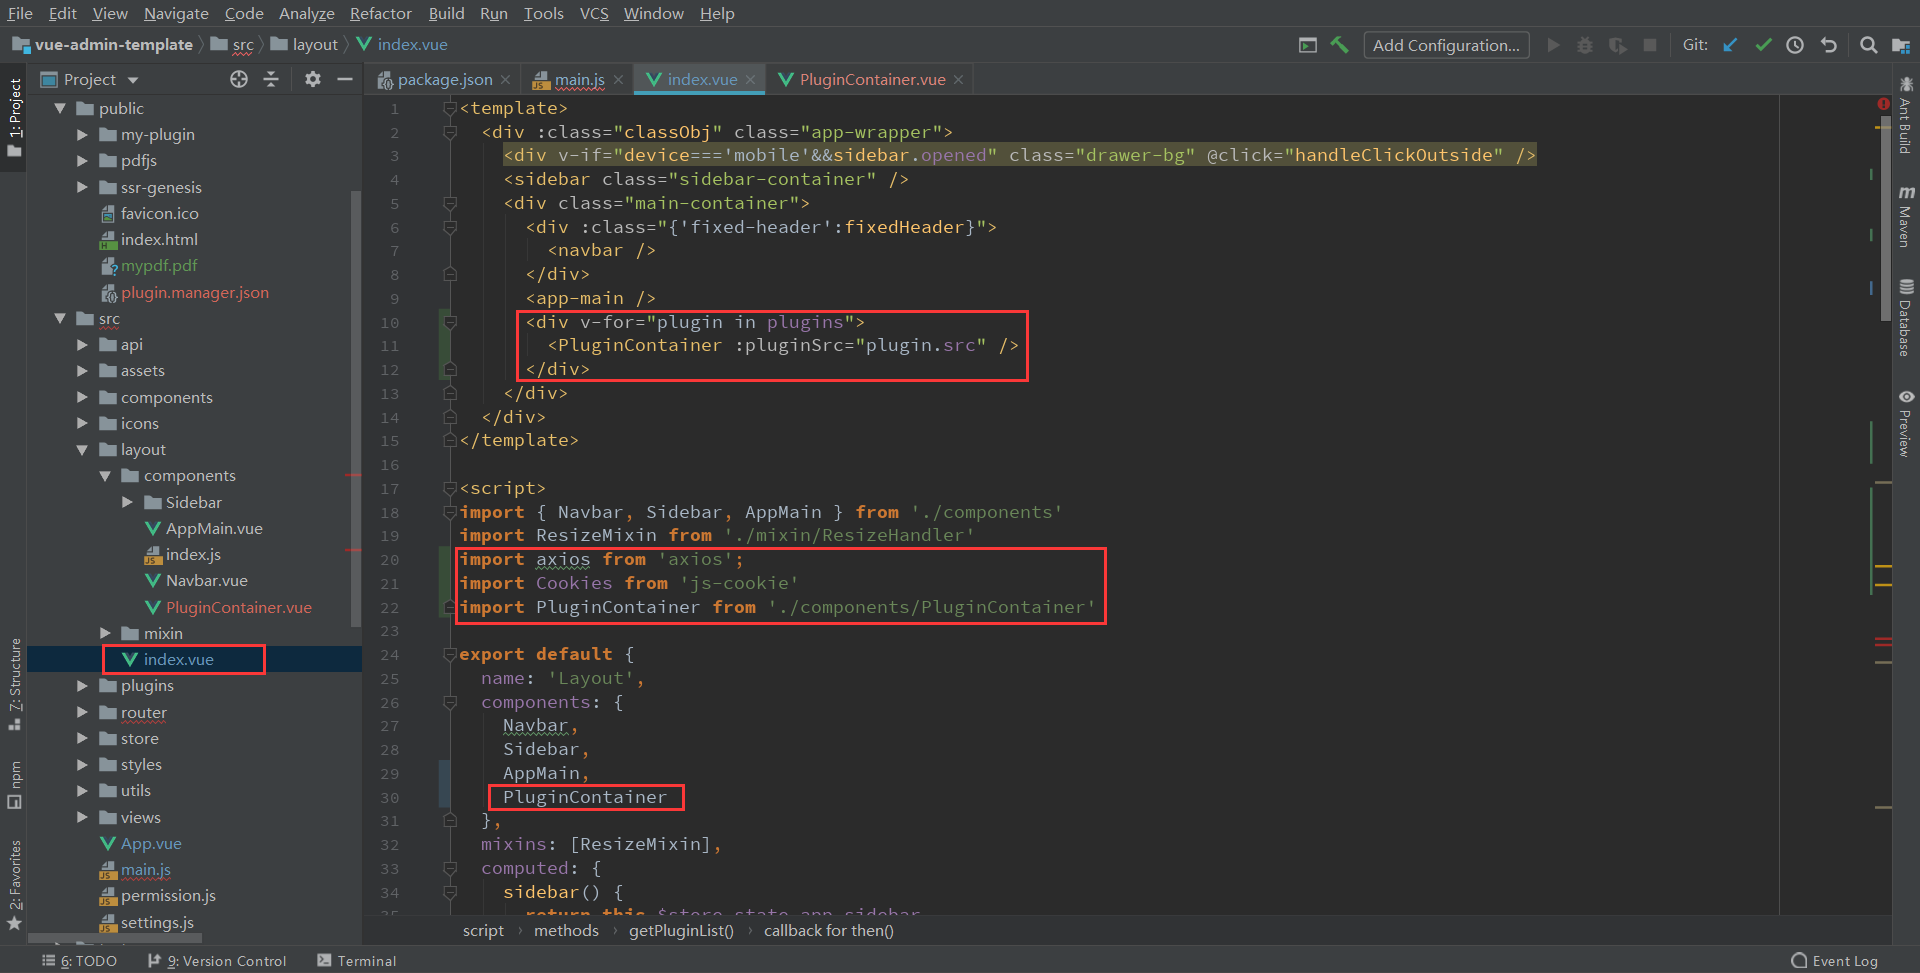
在主页中动态加载远程组件
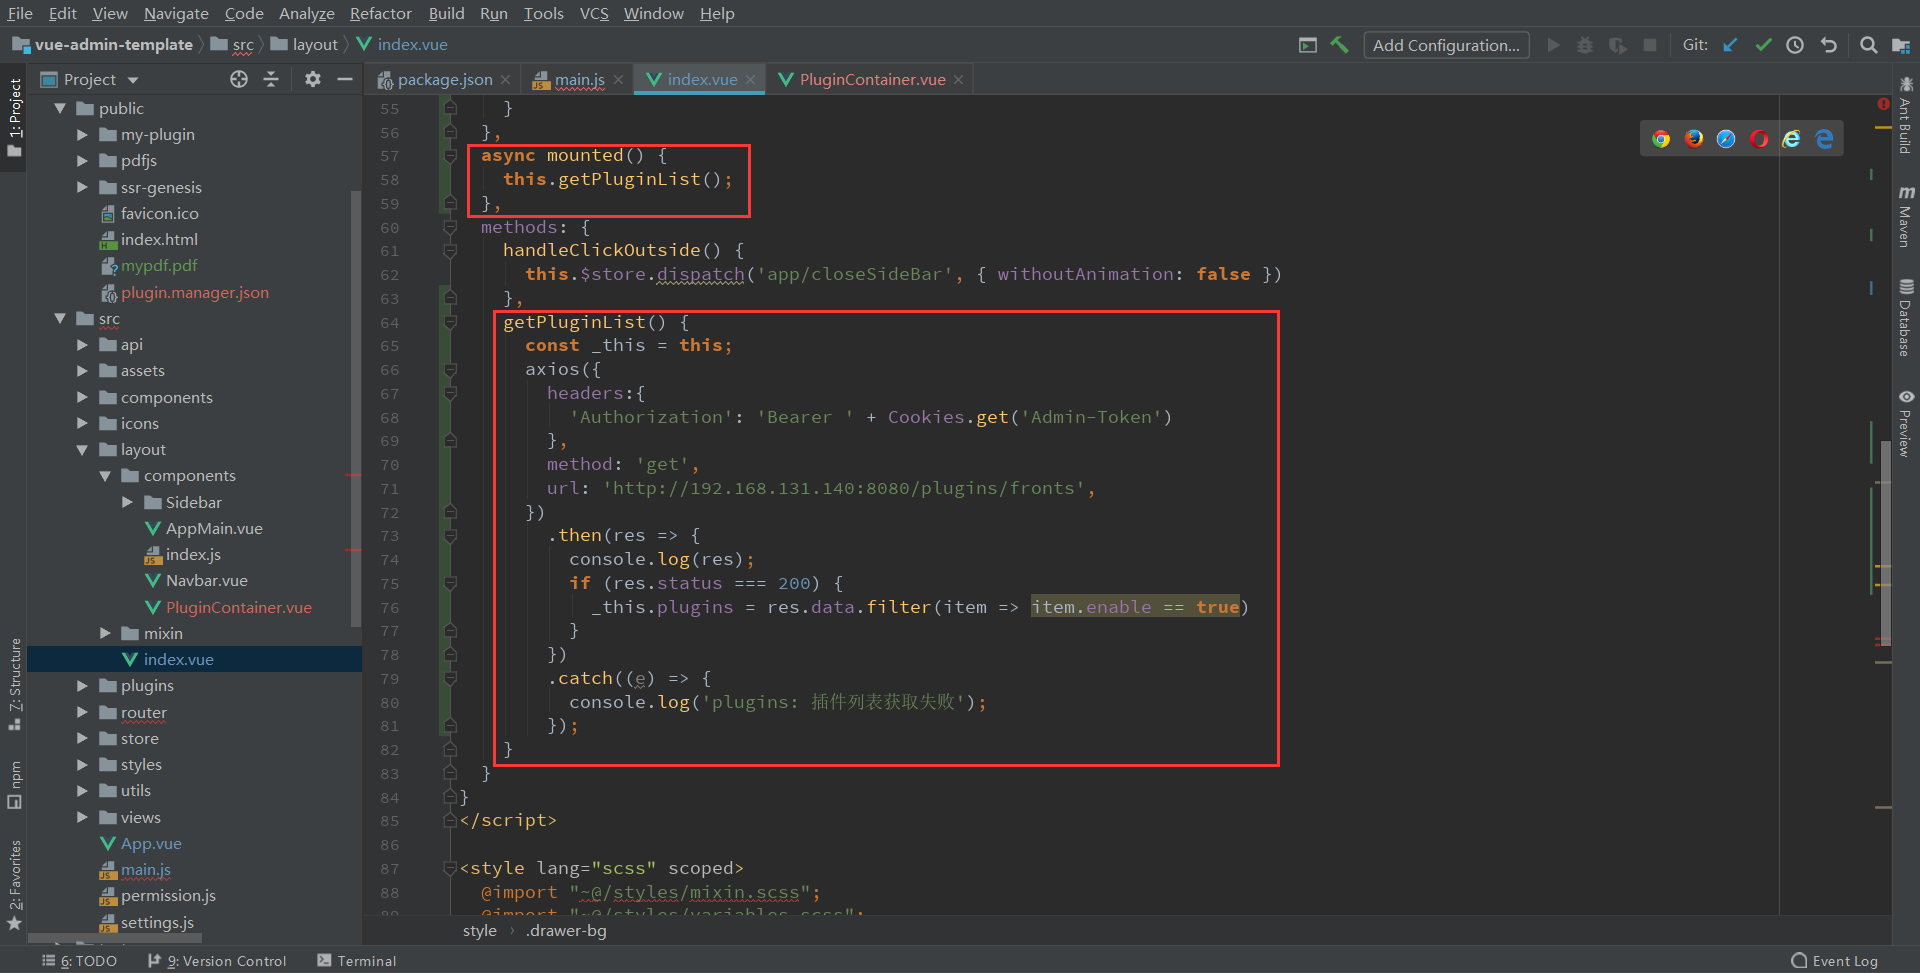
1 2 3 4 5 6 7 8 9 10 11 12 13 14 15 16 17 18 19 20 21 22 23 24 25 26 27 28 29 30 31 32 33 34 35 36 37 38 39 40 41 42 43 44 45 46 47 <!-- ... --> <div v-for="plugin in plugins"> <PluginContainer :pluginSrc="plugin.src" /> </div> <!-- ... --> <script> import axios from 'axios'; import Cookies from 'js-cookie' import PluginContainer from './components/PluginContainer' export default { name: 'Layout', components: { PluginContainer }, data() { return { plugins: [] } }, async mounted() { this.getPluginList(); }, methods: { getPluginList() { const _this = this; axios({ headers:{ 'Authorization': 'Bearer ' + Cookies.get('Admin-Token') }, method: 'get', url: 'http://192.168.131.140:8080/plugins/fronts', }) .then(res => { console.log(res); if (res.status === 200) { _this.plugins = res.data.filter(item => item.enable == true) } }) .catch((e) => { console.log('plugins: 插件列表获取失败'); }); } } } </script>
此处访问后台接口 /plugins/fronts
获取插件列表,根据插件列表动态加载远程组件
1 2 3 4 5 6 7 8 9 { "data" : [ { "enable" : true , "name" : "myPlugin" , "src" : "/my-plugin/app.json" } ] }
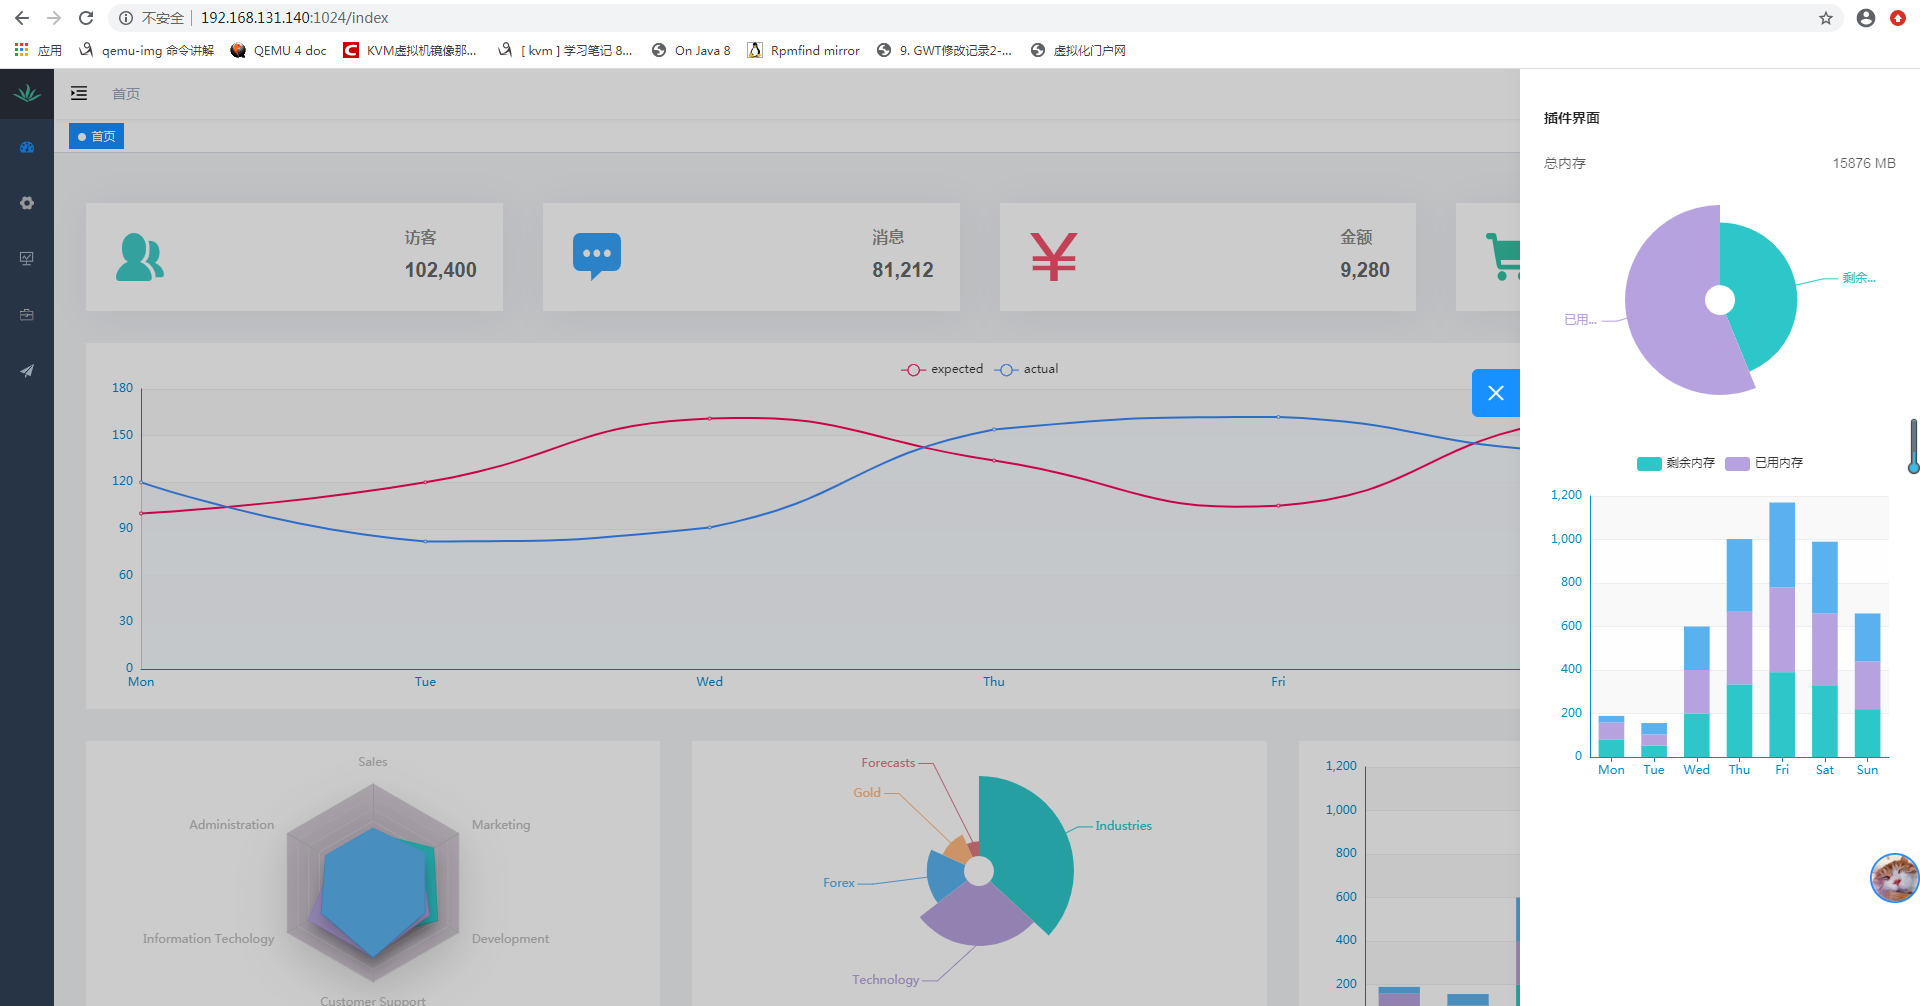
效果预览
genesis-app 多路由 vue-router 不支持一个页面上创建多个历史模式的路由实例,否则调用 router.push()
方法时,将会创建多个历史记录,为了解决这个问题,请使用 genesis-app 的路由
它提供了快速创建APP的方法,以及包装了 vue-router
,解决了在历史模式下,多个 Router
实例冲突的问题
安装 1 npm install vue-router @fmfe/genesis-app
使用 在 app.vue
中添加 <router-link>
和 <router-view>
1 2 3 4 5 6 7 8 9 10 11 12 13 14 15 16 <template> <div class="app"> <h2>Hello World!</h2> <p v-if="show" @click="clsoe" class="text"> {{ installed ? '在客户端应该安装成功,点击我关闭!' : '未安装' }} </p> <ul> <li> <router-link to="/about/us">关于我们</router-link> <router-link to="/about/help">帮助</router-link> </li> </ul> <router-view></router-view> </div> </template> <!-- ... -->
在 src
目录下新建 views
文件夹,在该文件夹内创建 about-us.vue
和 about-help.vue
两个文件
1 2 3 4 5 6 7 8 9 <template> <div>关于我们</div> </template> <script lang="ts"> import Vue from 'vue'; export default Vue.extend({ name: 'about-us' }); </script>
1 2 3 4 5 6 7 8 9 <template> <div>帮助中心</div> </template> <script lang="ts"> import Vue from 'vue'; export default Vue.extend({ name: 'about-help' }); </script>
在 src
目录下创建 router.ts
文件
1 2 3 4 5 6 7 8 9 10 11 12 13 14 15 16 17 18 19 20 21 22 import { RouterMode } from 'vue-router' ;import { Router } from '@fmfe/genesis-app' ;interface State { routerMode?: RouterMode; }export const createRouter = (state: State ) => { return new Router({ mode: state?.routerMode || 'history' , routes: [ { path: '/about/us' , component: () => import ('./views/about-us.vue' ).then((m ) => m.default) }, { path: '/about/help' , component: () => import ('./views/about-help.vue' ).then((m ) => m.default) } ] }); };
客户端使用
1 2 3 4 5 6 7 8 9 10 11 12 13 14 15 16 import { ClientOptions } from '@fmfe/genesis-core' ;import { createClientApp } from '@fmfe/genesis-app' ;import { createRouter } from './router' ;import Vue from 'vue' ;import App from './app.vue' ;export default async (clientOptions: ClientOptions): Promise <Vue> => { return createClientApp({ App, clientOptions, vueOptions: { router: createRouter(clientOptions.state) } }); };
服务端
1 2 3 4 5 6 7 8 9 10 11 12 13 14 15 16 import { ClientOptions } from '@fmfe/genesis-core' ;import { createClientApp } from '@fmfe/genesis-app' ;import { createRouter } from './router' ;import Vue from 'vue' ;import App from './app.vue' ;export default async (clientOptions: ClientOptions): Promise <Vue> => { return createClientApp({ App, clientOptions, vueOptions: { router: createRouter(clientOptions.state) } }); };
主项目引用 主项目的 router 设置为 history
模式
1 2 3 4 5 6 7 8 9 10 11 12 13 14 15 16 17 18 19 20 21 22 23 export const constantRoutes = [ { path: '/about' , component: Layout, children: [ { path: 'us' , name: 'AboutUs' , component: () => import ('@/views/plugin/index' ), meta: { title : 'Plugin' , icon : 'eye-open' } }, { path: '*' , component: () => import ('@/views/plugin/index' ), name: 'About' , meta: { title : 'Plugin' , icon : 'eye-open' , activeMenu : '/about' }, hidden: true } ] }, ]
views/plugin/index.vue
界面
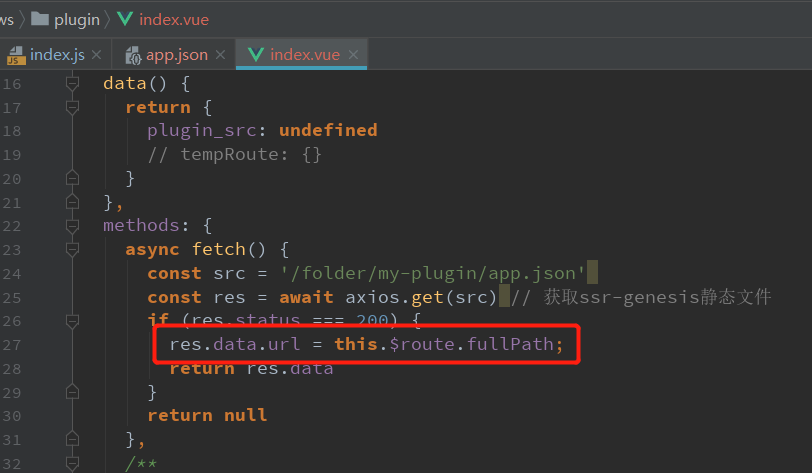
1 2 3 4 5 6 7 8 9 10 11 12 13 14 15 16 17 18 19 20 21 22 23 24 25 26 27 28 <template> <div class="plugin-container"> <RemoteView :fetch="fetch" /> </div> </template> <script> import axios from 'axios' import { RemoteView } from '@fmfe/genesis-remote' export default { name: 'PluginContainer', components: { RemoteView }, methods: { async fetch() { const src = '/folder/my-plugin/app.json' const res = await axios.get(src) // 获取ssr-genesis静态文件 if (res.status === 200) { res.data.url = this.$route.fullPath; return res.data } return null } } } </script>
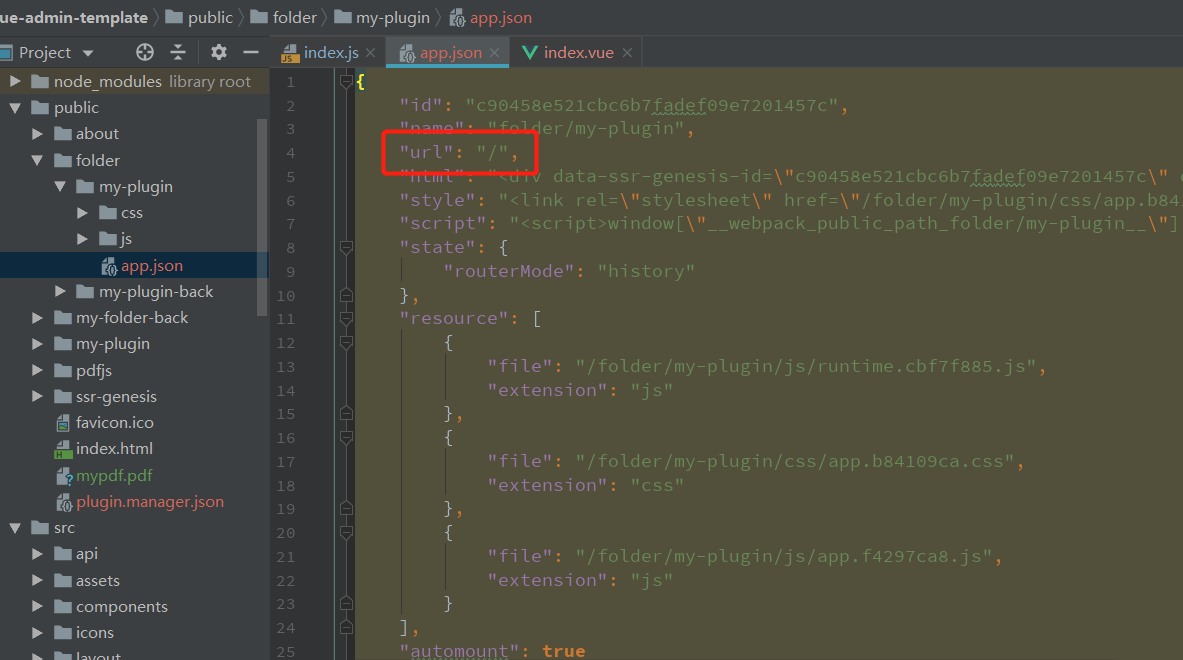
只需设置 app.json
里的 url
的值即可实现 genesis-app
的链接跳转
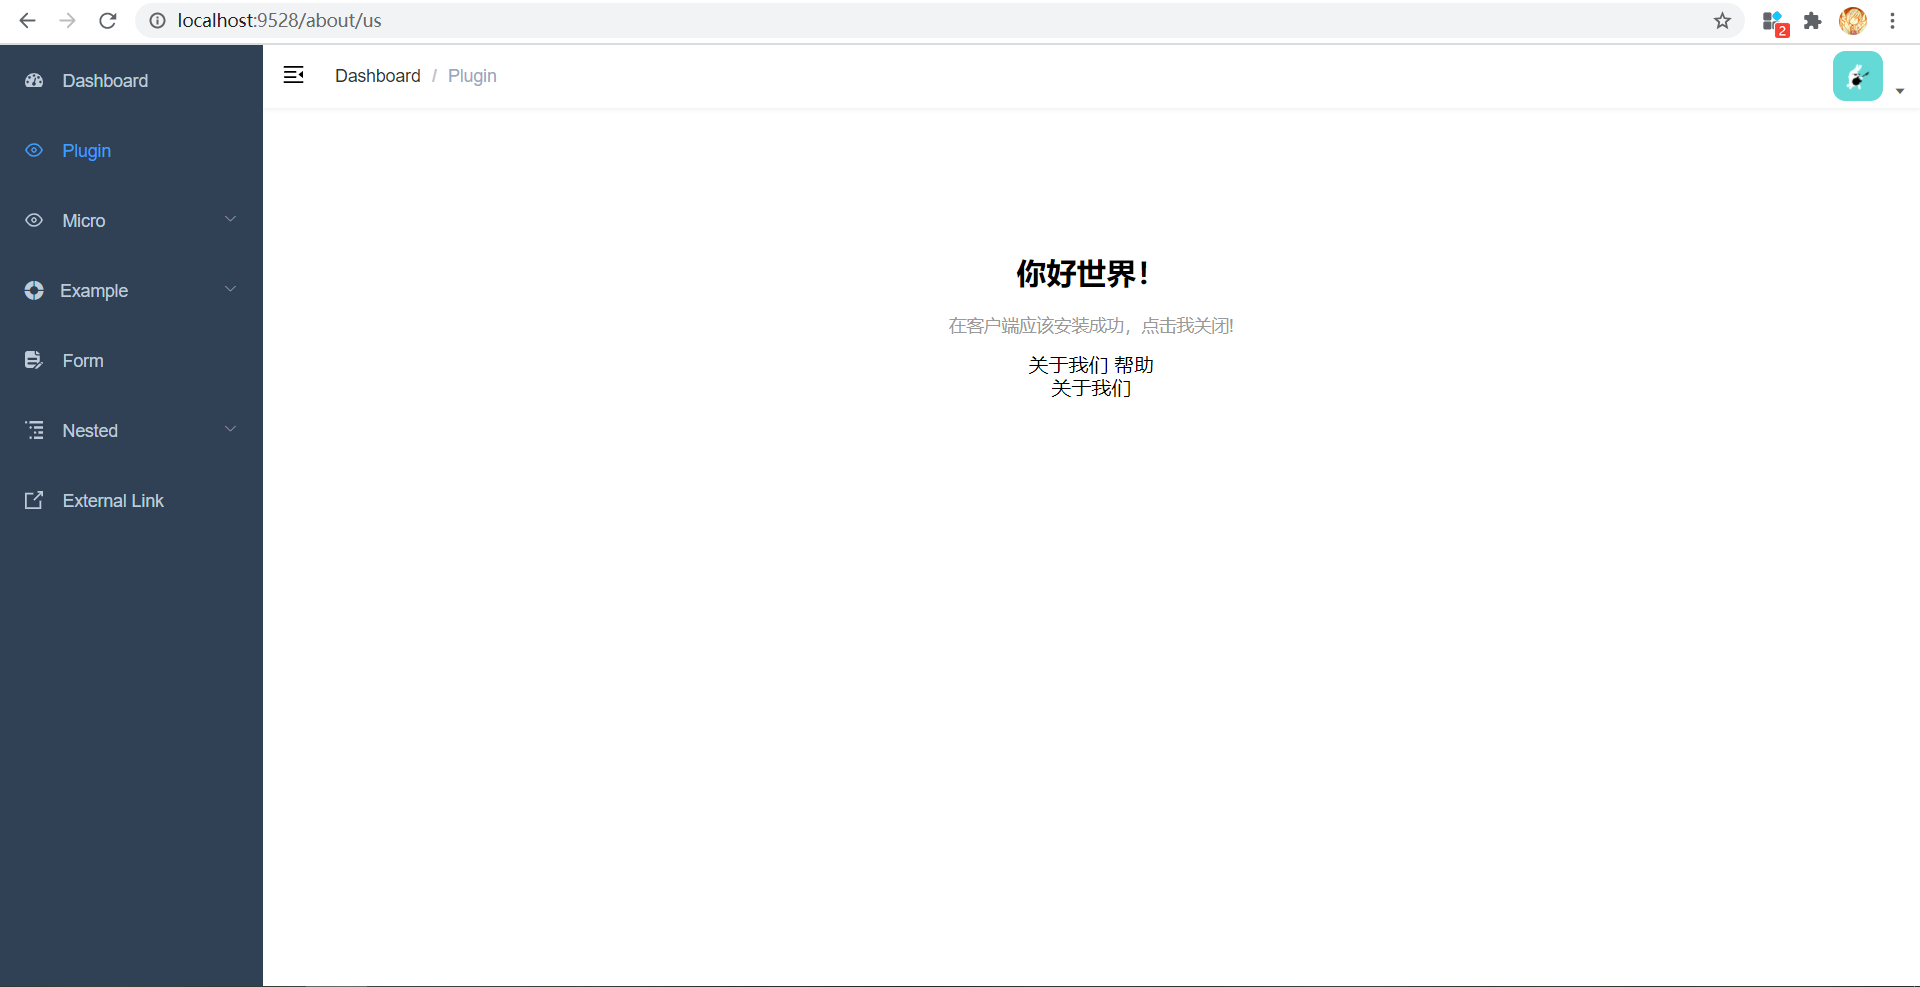
效果预览